DR SEAT MODIFICATION
|
|
DR SEAT MODIFICATION |
|
We have discovered that the DR is lacking in design when it comes to holding the seat on. I believe it was on our second ride after the utility rack was installed on the DR. We were just past Jean on our way to Boulder City. We had already traveled around 80 miles when while I was trailing Keith (because he is just that fast!) I noticed him stand up and the rack bounced up off the fender and hit him in the back. Heck at first I thought he had lost the seat or something, it was quite unusual! We managed to find some nuts and bolts that I was carrying to bolt the rack onto the fender, but we had lost one of the bolts holding the rack on the sides. We finished our ride all the way to Boulder City and back to Pahrump covering over 220 miles, and the bikes were in need of some maintenance. Unfortunately we didn't have time to perform that maintenance until our season ended and summer began.
| After struggling with the DR seat and rack for
several rides I think we have come up with a low cost solution to prevent
this from continuing to hamper our riding progress. We must have stopped
at least 10 times over the season just for having to make adjustments to
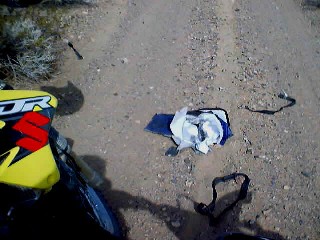
the DR seat and rack. Heck even one time the bag we had strapped on to the
DR had come loose and a strap got caught in the chain where the bag was
instantly ripped to shreds by the tire! As a matter of a fact I remember
that being on our same trip to Boulder City.
Check out some of the images we captured using a cheapo digital camera on that ride in the gallery! If you just want to see the Boulder City gallery click here. So back to the story about the DR seat. In the off-season (summer) we finally had a chance to repair the seat mount. After taking the seat off the DR it as apparent that some damage had been done to the factory mounts. I think it is a poor design by Suzuki so we came up with the threaded rod idea. |
 |
After a few trips to home depot I had the parts in hand and ready to improvise.
Here is what I picked up:
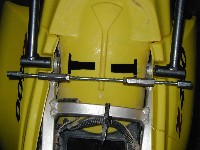
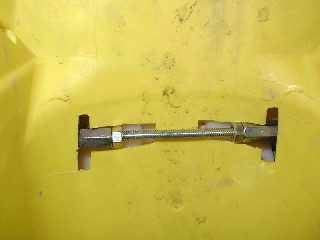
You can see all the parts assembled together in the picture along with the two T-shaped holes that were cut out of the rear fender to accommodate the threaded rod. I used a box cutter knife to make the fender cutouts. It is a simple idea the threaded rod goes all the way through were it is held on by a couple nuts. One obstacle that had to be overcome was the diameter of the threaded rod was way too small in comparison to the large holes in the Suzuki frame. In the original design Suzuki had a spacer to fill that hole and a nut welded on the frame behind the spacer. This proved that it couldn't hold up in the desert. |
 |
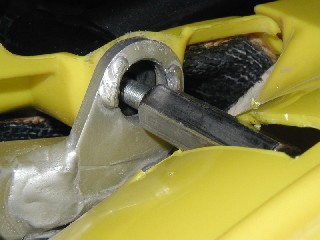 |
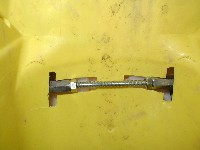
Here you can see that large hole in the frame and the remnants of the weld where the original bolt was welded to the frame. To overcome this, the large coupling nut works quite well. Also because of the length of the coupling nut you can tighten it down from underneath the fender where the T-shaped hole is at. | 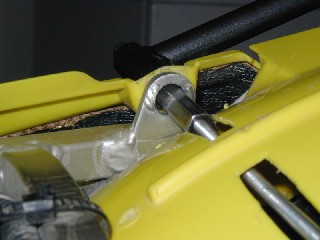 |
The threaded rod ended up being about 1" too long which was taken care of using a hack saw. Also one of the small coupling nuts was JB Welded to the threaded rod. This really helps with keeping things tightened and when threading all the other nuts on the rod. The small coupling nuts were chosen because a 1/4" nut fits in the hole of the rack where, but leaves no additional room to slip a socket over it or way to tighten everything down. The small coupling nut is long enough to stick out a little and thus allow one to use a wrench or socket.
| Bottom line of this repair is the seat and utility rack should now be secured. Perhaps the only drawbacks are having to cut holes in the rear fender and the small coupling nuts extending out of the rack a small amount. | 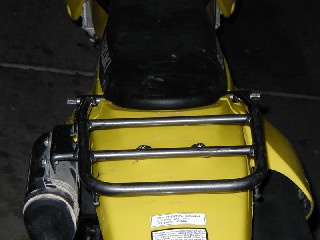 |
 |
Back to desertmx maintenance