Softer KTM Seat?

|
Softer KTM Seat? |
|
Ok, KTM's are known for their hard seats. Some people like them that way? I on the other hand find the seat to end up being a pain in the ass, especially after a long days ride. During the first season of DesertMX riding I had not modified the seat. I did go out and purchase the KTM tall seat hoping it would prove to be softer, but after several rides I found it broke in a little but was still much too hard for my backside. So it was time for a modification.
Since I now had the original factory seat and the tall KTM seat I thought about simply purchasing new soft seat foam and replacing what came from the factory. That is still a possibility if I find this modification doesn't provide the necessary improvement. The other option out there is to purchase a new complete seat from SDG or similar. I've read good reviews about these seats, but since I already had the extra base I didn't need the complete seat.
While visiting the KTM TALK site I read a thread about drilling holes in the bottom of the foam and removing the core. I thought might as well give it a try. So here is what I did:
You will need the following tools to complete this:
First remove the seat from the bike and find somewhere comfortable to perform the modification. Remove the brackets from the base then proceed with removing all the staples from the underside of the seat which hold the seat cover on. There will be several staples, take you time trying not the puncture the seat cover. Once you have all the staples removed you might have to peel the seat cover off because it was glued to the base from the factory. Again take your time.
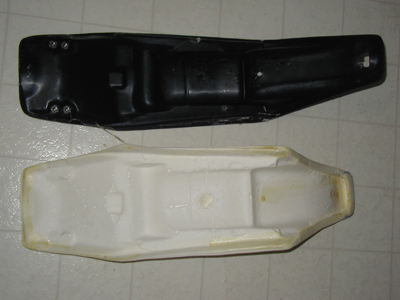
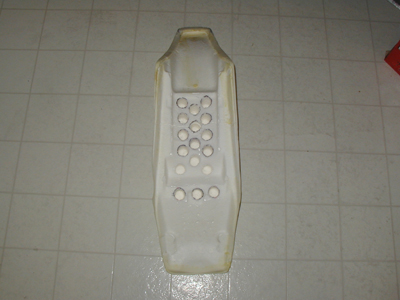
| Once you have removed the seat cover you should have something similar to the following pictures. | 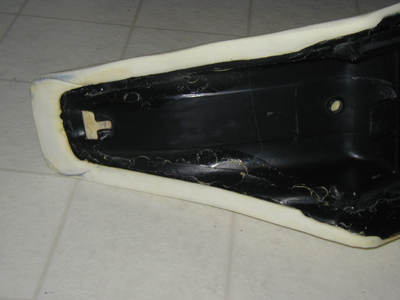 |
 |
Now it is time to remove the foam from the base. Again you will find this had probably been glued to the plastic base. Be certain to take you time again and slowly separate the foam from the plastic base.
|
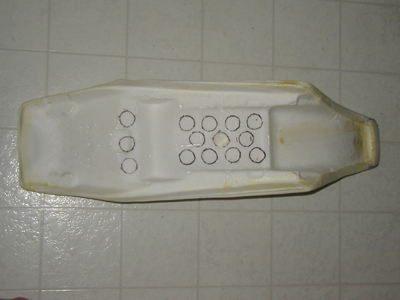
Alright, the easy part is over. Now inspect
everything and get prepared to start drilling. I marked the locations
where I wanted to drill the holes with a sharpie by tracing the outline
the keyhole bit would make. The basic guideline is to make 3 rows of 5
holes in the meat of the seat where you normally sit. By reducing the
density of the material it should prove to be give easier when sitting and
have a softer feel.
|
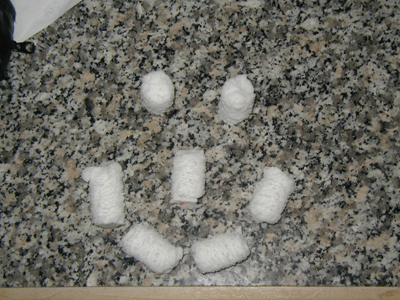
Keep in mind that you will be removing material from the bottom of the foam. You will want to leave about an inch of solid material at the top of the seat. If you don't you will be able to see the holes through the seat cover. What I did was drill the first hole very slowly and shallow originally. Then I removed the core and used a toothpick to check the depth of remaining material. I measured off one inch on the toothpick and marked the toothpick. Then inserted it in the hole and pushed it through the foam until the 1" mark was level with the bottom of the hole. By lightly pressing on the top side of the foam where the toothpick should be located you should be capable of determining the necessary depth of the hole. If you can't feel the toothpick remove some more material. Once you have determined the correct depth of the holes mark it on the keyhole bit and proceed to drill out the holes. Just remember the 1 inch of material you want from the bottom of the hole to the top of the seat. I used scissors to remove the cores. I think pliers would work just as well; simply squeeze, turn, then pull the core out.
 |
 |
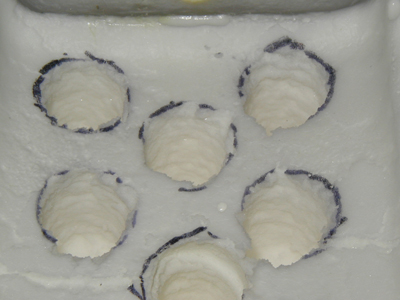 |
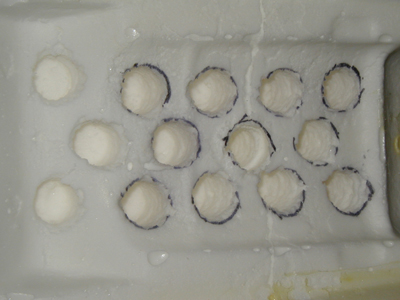
| Drilled a few more holes than what I originally marked. | And some more holes. | Close up of those holes. |
Once you have finished drilling out the holes and removed the cores it is time to reattach the foam to the plastic seat base. Since it came glued from the factory it is probably best to glue it back on. I used Elmer's Rubber Cement. Just slap some on both pieces and stick them together. Set them aside and let them dry for an hour or two or longer. Now the hard part of reattaching the seat cover to the seat base. I found a good article in pdf format here. Unless you have and electric stapler you will probably find getting the staples through the tough plastic difficult. The stapler I used got was able to get the staples most of the way through the plastic but I found a hammer and the flat bladed screwdriver to be useful to get the staples the rest of the way through. Of course the stapler I had only costs $10 at Home Depot. Once you have the seat cover installed bolt the brackets back on the base then mount the seat on the bike and enjoy the softer seat.
back to DesertMX Maintenance