
First off let me state that I am by no means a certified mechanic nor do I recommend anyone completing the following process if they are unsure they are capable. This document was created to document the procedure I took to clean the power valve assembly of a 2000 KTM 300MXC. Use the information contained within at your own risk.
|
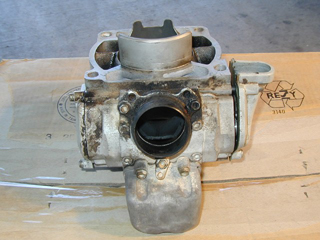
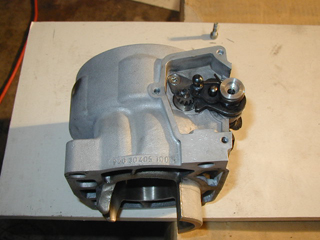
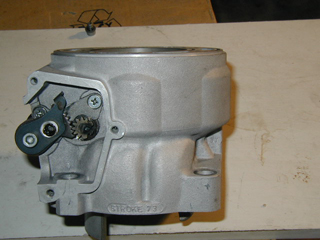
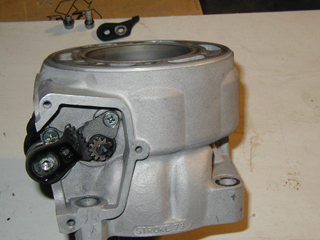
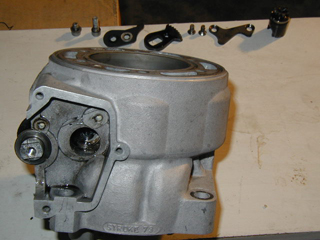
Here is the picture of an upside down cylinder with the exhaust flange facing you. |
|
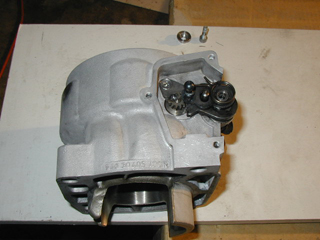
The power valve cover is held on by clear silicone and 4 screws. After removing the screws the cover can be pried off with a little effort. |
|
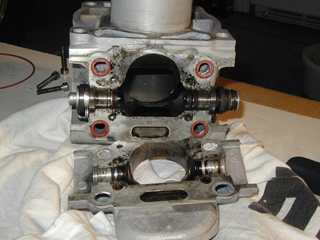
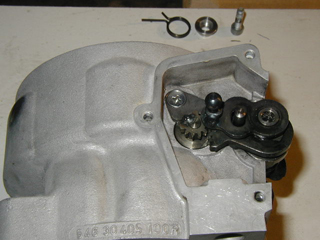
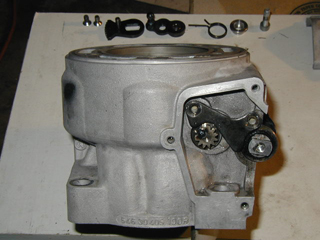
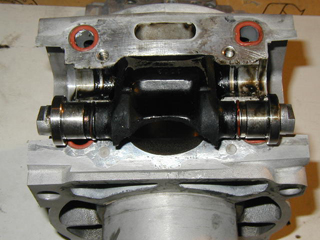
Side view after cover has been pried off. Notice the o-rings where the coolant will travel through the cover. Also notice the power valve assembly is still intact. |
|
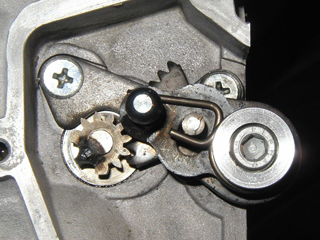
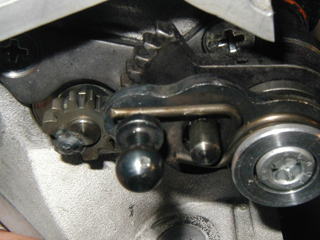
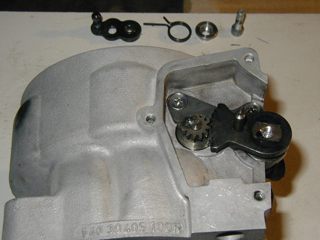
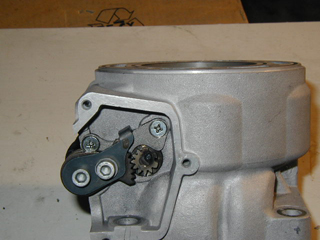
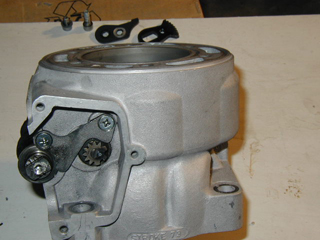
This picture is of the actuator side before anything had been disassembled. Notice the tic marks on the gears and how they line up. This is important to pay attention to especially during reassembly. |
|
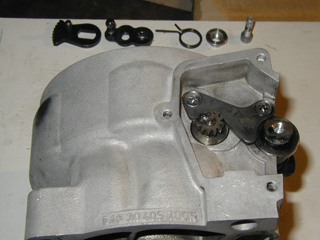
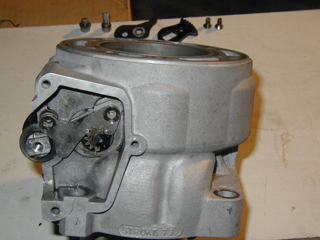
Here is the top view of how the spring is assembled correctly. |
|
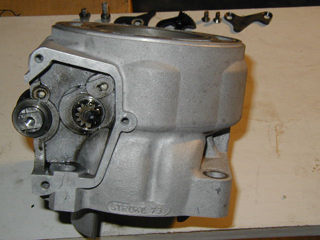
This begins the disassemble of the actuator side of the power valve. Here I have removed the hex screw. |
|
Removed the washer/spacer/spring retainer. |
|
Removed the spring. |
|
Removed the actuator knob part. |
|
Removed the gearing. |
|
Removed the two machine screws. These are a bitch to remove. Pay particular attention not to strip the heads. I believe I used a combination of heat, WD-40, and arm strength to get these out. |
|
Removed the retaining device. |
|
Removed the tumbler. |
|
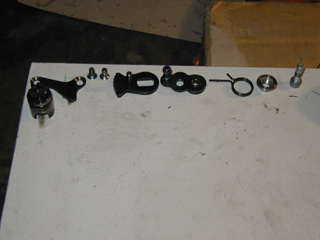
Here are all the parts in the order they were removed from right to left. For reassembly start at the left and go right. |
|
Now for the other side. |
|
Removed one bolt and the washer. |
|
Then the other bolt. |
|
Off comes the stop adjustment piece. There is a washer that was attached to this piece. It will move freely but appears have taken a specific shape as to how it fits. |
|
Now the gear. |
|
Then those VERY difficult machine head screws. |
|
Off with the tumbler retainer. |
|
Out comes the tumbler |
|
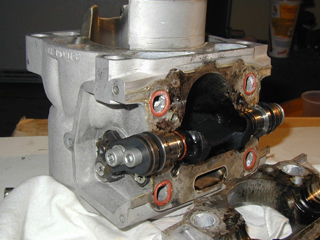
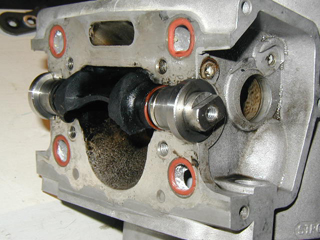
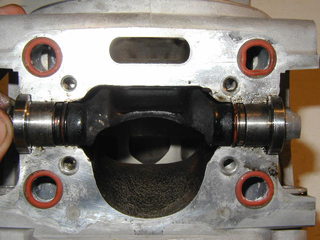
Once all the side pieces were out all that was left was the flapper. |
|
Out comes the flapper. |
|
It has been removed, just pay attention to how it goes back together. |
|
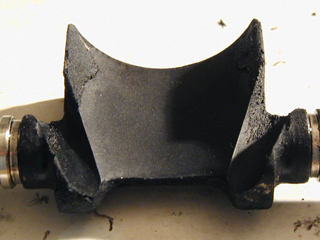
See that carbon buildup. |
|
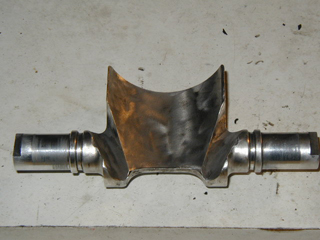
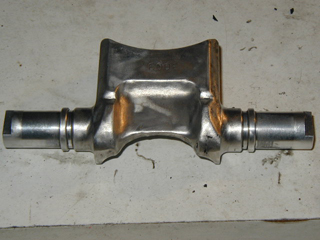
A stainless steel tipped brush and a dremel made relatively quick work of removing the carbon. It worked, but probably took some of the actual aluminum off. From what I understand, but have never tried is oven cleaner is the ticket here but that is also suppose to be bad for the aluminum if you leave it on too long. Next time I'll give it a 10 minute bath in oven cleaner and see how well that works. |
|
The other side of the cleaned flapper. |
|
With everything cleaned up it is time to put it all back together. I just reversed the order of how I took everything apart. Remember to line up those tic marks on the gears during reassembly. Then you should be able to rotate the flapper and when it is open the tumblers should also be open. Pretty simple actually. |
|
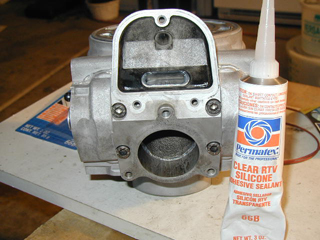
Once everything was assembled again I used the clear silicone to stick the cover back on. I made sure to fully circle the o-rings where the coolant comes through. Wouldn't want anything to spring a leak. |
|
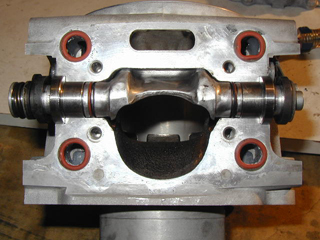
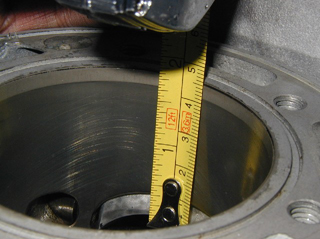
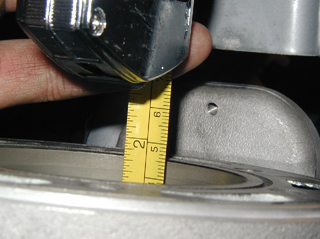
Now it was time to measure the "Z" dimension. With the power valve in the closed position the measurement is taken from the bottom of the flapper to the top of the cylinder. My manual stated it should be 46mm, which is what I measured. |
|
46mm, right on the money! Time to put the cylinder back on the bike. |
| Back to DesertMX Maintenance | |